Tuesday, May 31, 2016

Christmas Hot Pot Pads

  Yes, I've been working on Christmas in May. Because of  my bucket list items, I have made some long term plans, one being getting Christmas projects done in the spring and summer.  I've never been able to get  these projects done early, because I couldn't get in the mood to be creative. When Jen asked recently for volunteers to try out her appliques, I thought this was my chance to get 2 things done at once: Help out Jen & get some Christmas projects finished early.  We were asked to come up with ideas and ways to use her applique patterns.  I did some trials on the ball ornament.  Jen has refined the ornament and come up with the best looking pattern.  You can find her patterns published over at  Jen's Faith & Fabric.   Here is how I made those Hot Pot Pads to set my Christmas dishes on.

***********************************
*A Tutorial Tuesday*
 **************************

While reorganizing and purging, my Christmas fabric box got more full.  
Some of these fabrics came from the 1980s.

A chance to use your heat resistant or cotton batting scraps.
First stitch the applique to one of the fabric squares.
I used my scrap embroidery tear away stabilizer on the back.
Here are my settings for zig-zag applique.
Then place the fabric squares right sides together
 and lay on top of the batting.
Stitch 1/4 inch around the edge except for.....
....leaving an opening which has a length of unstitched thread across the opening. I like the method above when I'm stitching something to turn inside out. The unstitched free thread provides a folding line which helps turn the seam under the right amount to iron and top stitch.
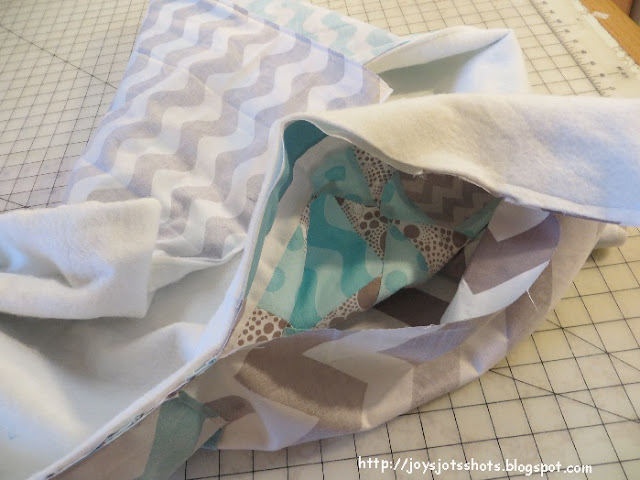
Turn inside out.
I used an Edge Stitching foot
 (Joining Foot or Edge Joining Foot it could be called)
 to top stitch all around.
The top stitching securely closes
 the opening left for turning inside out.
I like the extra quilting motif art resulting on the backside.

 
Another Hot Pot Pad
made experimenting with 
the ornament top 
using the good ole Blanket Stitch.

I also tried straight stitching.  
I wish I could make mine look "folksy" like some do.
 I'm too use to being accurate I guess.
Maybe black thread would have done the "folksy" job?
This is only 1 applique pattern out of 15 that Jen is now offering!
All are sized to fit charm squares. 
Use all of them on a Hot Pot Pad, or
use one of the many other idea suggestions in her packet.
You can find them over at Jen's Faith & Fabric.
Please go check out the rest. 
 ********************************
Thanks to the FREE programs:
possibly used for this post

 Photoscape for downsizing & watermarking photo
PicMonkey creating the icon used on this page


Monday, May 30, 2016

Memory Monday 10 ~ Sewing Room Solace

Since Fall 2011
A place I go to and when the smells of the fabrics hit me,
I'm comforted immediately for some reason.

****************************************
Thanks to the FREE program

 Photoscape for downsizing & watermarking photo & other alterations to pictures.

Sunday, May 29, 2016

Sun Best ~ Bernheim Yellow


@ Bernheim Forest
Clermont, KY


****************************************
Thanks to the FREE program

 Photoscape for downsizing & watermarking photo & other alterations to pictures.

Saturday, May 28, 2016

Quilt Shot Block #70 ~ Exploding Block

Exploding Block
about 5 inches
This is the baby quilt that went inside the gift bag
shown  during the last Tuesday Tutorial
Found the pattern at a Missouri Quilt Company video
Start with 4 inch squares
Put 2 squares right sides together.
Stitch quarter inch all around the square.
Cut one of the layers from corner to corner.
Press open (explode)
Place a 5 inch square, or whatever your block exploded to,
right sides together and stitch all around.
Cut the new added fabric only from corner to corner
Press out (explode again)
Notice the points weren't created with this method.
I didn't worry about matching.
Just made sure the edges of the block lined up.
It really didn't show up in the whole quilt look.

Put fat quarters together to make the back.
I pieced together batting.
I used painter's tape to hold the pieces side by side.
Zig-Zagged stitched the batting together while laying side by side.
I just needed it to hold together until I got the quilting done.
I was crazy enough to even piece the corner.


I decided to use the "birthing" method that Eleanor Burns used to use in her beginning days.
She may still do it?
Lay the front and backing face to face, and then the batting on top.
Stitch 1/4 inch all around except for an opening to turn the quilt inside out.
Turn inside out.
Press the edge seams out, turn under the opening 1/4 inch and press.
Top stitch around the edge to make sure to stitch down the seam.
I try to sign my quilts on the binding, or in this case here.
I did add a border of  leftovers that I pieced together.

It was fun to see these blocks explode.

********************************
Thanks to the FREE program

 Photoscape for downsizing & watermarking photo & other alterations to pictures.
and making the quilt sample pictures with the COMBINE tool.
*****************************************************
Sharing at several Linky Parties including:

Linky TuesdaySew Cute Tuesday


Friday, May 27, 2016

Fun or Funny Fri Foto ~ Finger Rotary Cutter

When I was a Technology Resource teacher,
several students called me Gadget Lady,
 because I would be carrying around the newest techie thing.
These days the type of gadgets I collect,
are a bit different.
I did use this on a very small pattern.  
 *******************
Thanks to:
Photoscape for downsizing, watermarking photos & editing.


***********************
Please see my "Linky Parties" link above

Thursday, May 26, 2016

Thoughtful Thinking Thursday #49 ~ Thankful Results?

Last night Just before I settled into bed, I noticed it was 1:00 am exactly. As if on cue, when I  turned out the light, a large amount of noise over my head came crashing.  First thought? I'd knocked my headboard wall hanging down.  The sound was prolonged a bit. So I thought a bookshelf fell upstairs.  Creepy things have happened in this house for no reason at all.  As I finally looked out my window, I saw what happened.
First evaluation shows no damage, not even a broken window!
But, why?
No wind, not even a breeze.
I did finally get some sleep, but up early taking more pictures.
It fell through the gate opening.
It took out parts of 3 sections of the fence.
The worse part so far is the mess it made on the neighbor's side 
as it laid down in their garden.
Best I can tell, just clean up damage to their property.
And I can't tell if this one branch poked a hole in the eve of the house.
If so, thank goodness it's on the side of the house that the rain doesn't reach easily.
So I'm in lots of thought this morning.
#1 Thankful there is no human damage.
#2 Thankful the back side of my house wasn't ripped off.
#3 Lesson learned- When there is one dead branch and the rest with live green leaves,
the trunk may have a problem.
 *******************
Thanks to:
Photoscape for downsizing, watermarking photos & editing.


***********************
Please see my "Linky Parties" link above